This is my ever favourite Malay delicacy. To those who are not familiar, karipap is a Malay version of curry puff. I'm very sure the person who first started making karipap knew the English Language. Curry Puff - Karipap! What a brilliant idea!! To prepare karipap, the first thing to prepare is the curry fillings. I love use lots of chopped onions. As always, stir fry the onions with oil until almost golden. While waiting, take a packet of curry powder & mix with a little bit of water. If you like you may add chilly paste or paprika to the curry paste. But I do not in this recipe. I prepare this for my girls to take to school for their snacks. I would if I were to make it only for hubby & I.
After that, add a bit of water & oil (if necessary). Wait for a couple of minutes for the curry paste to properly cooked.
Next join minced meat in the pan. Stir thoroughly & let the meat simmer together with the paste. Do not add water yet as the meat will produce some juice.
Chop about 4 - 5 potatoes & put all inside the pan. Add water just almost covering the potatoes & salt according to taste. Next is to wait for the potatoes to tender.
Once the potatoes are almost tender join the already chopped chinese celery. This can also be substituted with coriander leaves.
Now you have the curry fillings. It's okay if you prepare the fillings extra. It can always be stored in the freezer for a later time when you are in the mood to prepare the pastry again. I normally prepare the fillings first, store it the fridge & only the next day I get the pastry done.
Here is the fun part. Preparing the dough. I use margarine in this recipe. Have never used butter before. Please do by all means & tell me about it. Wheat flour & margarine mixed together.
I do not measure according to amount but more to colour. If the colour turns slightly yellow then it is ready to be kneaded with water. Not too much. Just enough for it to turn to this soft & smooth dough.
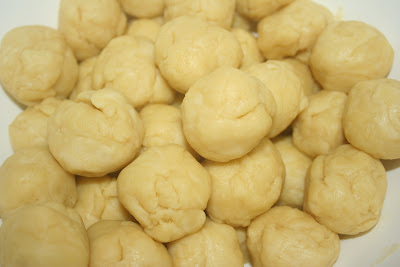
To prevent from waste, my mother taught me this trick of rolling the dough to small balls about the size of a golf ball. In fact, you can even estimate the mount of karipap you will get to prepare.
Roll the ball flat to almost an oval shape.Not too thick & also not too thin.
Scoop about a tsp of the earlier prepared fillings & put it onto the flattened dough.
Seal it all around carefully.
I am not sure what the next process is called. Basically it to strengthen the seals. With your thumb, press the edges downwards orderly until you reach the end of the edge.
There you have it. But it's not edible yet. It needs to be fried with slow fire.
These karipaps can be stored in the freezer. It is the best snack to serve to guests especially the unexpected ones. The yummy looking& delicious taste karipap.
Whenever I cook or even bake, the kitchen is strictly for me. But it is an exception here. My kitchen in here is open to all. Come on, join me in my kitchen.
Friday, 30 March 2007
Wednesday, 28 March 2007
Pizza
Wow! I haven't posted anything for quite awhile. It's like I haven't been cooking!! The truth is, there was nothing special to post. But I have a few recipes to be uploaded, waiting for turns.
Prepared a pizza for my girls recently. I have been looking for a recipe that uses instant yeast & I found one. After a few adjustments, here it goes.
Add 250gm flour, with 140ml cold water, a sachet of instant yeast (11gm), 2 tbs oil & a tsp of salt inside a big bowl.
Mix & knead until it becomes like this.
Proof dough for 20 -25 minutes. Flatten the dough onto a pan (wise to oil first) & half bake the pizza base for 15 minutes at 220C.
Next is the best part... the girls always enjoy putting whatsoever they love onto their pizza. Due to the excitement I straight away put the unbaked pizza into my oven without taking any photo... But here is how it looks like after being baked for another 20 -30 minutes at 220C.
Care for a slice?
Sunday, 4 March 2007
Acar Timun
Here is another dish that I prepare to complete my Nasi Tomato. Acar Timun is something like cucumber salad. It is very easy to prepare. I normally get this salad ready first before cooking the other dishes. This is because the salad tastes better if preserved in the fridge.
Basically all ingredients are joint together in a salad bowl. Onions, fresh chillies, little bit of sliced tomatoes, sugar, salt & most importantly is the cucumber. Most people use vinegar. I don't because vinegar is very seldom stored in my house (what an excuse ...!).
Stir all together & store it inside the refrigerator.
Serve this together with Nasi Tomato & Daging Masak Kurma.