Saturday 23 February 2008

Castle Cake

This is my first attempt making a castle cake. It was more like a request from Wardah. She asked for a castle with a garden. The minute I heard that request, it did give me a jitter. But I took it as a challenge. Browsed the net for ideas & I came out with this castle cake.

I used 3 square shaped cakes. The 1st 2 cakes I baked a day before the icing process. The 3rd cake I baked on the morning of the following day.


I do not own a rectangular baking pan. As to make my cake a rectangle, I cut out an edge of the 1st cake. Next is to cut the 2nd cake to half. Join the 1st & 2nd cake together. Now you have a rectangular shape cake.


Now from the 3rd cake & the leftover cakes cut out 1 big square, 2 smaller squares & 1 tiny cube. Make sure the cube can fit the size of an ice cream cone & also the smaller square can fit the cube in the middle with 4 ice cream cones at each corner.


Now is the fun part... icing the cake. Ice each layer of the cake with icing. I use butter icing. Let cool in the fridge.


Once the butter icing is hard, ice the cake again with your desired colour. The reason for the 1st layer of icing needs to be chilled before the 2nd layer, is to make the icing process easier with crumbs free. I made a mistake for being too eager to ice the cake that I did not wait until the icing properly chilled. As a result, my cake was full with crumbs. Due to our hot weather, it is also recommended to put the cake in the fridge after icing each layer. Start from the top.

Put the cake in the fridge again. Arrange slices of cake in front of the castle. This will be the garden.


Use nozzle tip no.4 to make a line on each layer of the cake & decorate with edible silver balls.


Make a door using the same nozzle & silver balls.


Ice the garden with green icing & use nozzle tip no.233 to make grass.


Pound some Koko Krunch & sprinkle it in front of the main door.


I have prepared the castle towers the day before. This is the step-by-step guide to prepare the towers out of ice cream cone. As the cones were too fragile, I did not poke the paper flags onto the cones. Instead, I glued them using the icing.


My almost complete castle.


Princess Wardah's proud castle

Monday 18 February 2008

Spaghetti Bolognaise

This is another signature dish in my kitchen. Of course the rating is superbly high which obviously given by my girls... The kids love it & I'm sure most moms will love it too. It is very simple to prepare!! I've experimented the pasta sauce a couple of times & this is the one for my family. It might not be the traditional Italian recipe. Mine is quick but still is full with nutrition.

Heat olive oil in a pan. As usual, I do lots of sauteing in my recipe. Saute chopped onions for a few seconds & then add in minced beef into the pan.


Cover the pan & let simmer for a couple of minutes. Next is to join in chopped carrots. Cover again for a short while to let the carrots softened.


I use Prego pasta sauce. I prefer "Traditional" but it was out of stock. Instead, I settled with "Fresh Mushroom". Scoop in the sauce as required, put into the pan & cover again.


Next is to add in some chopped mushrooms. Unfortunately, I ran out of mushroom.

I then put in chopped celery. The tip is to chop the celery into small cubes so that kids have no choice but to eat it. If your child is very picky about vegetables, what you can do is to blend the carrots & celery together with the sauce.


Most of the celery was already in the pan, I forgot to snap the photo before the celery taking a dip in the sauce.


Sprinkle a little bit of thyme.


Salt & sugar to taste. Cover again for 5 minutes & your sauce is ready.


Let me present you... my Spaghetti Bolognaise.


Balqis right after school, still in her school uniform attacking the pasta.

Friday 8 February 2008

Cream Caramel Pudding

I love this pudding! Been making it since I was a teenage. But I stopped for quite some time. I was the only person in this household who was crazy about this dessert. Whenever I prepared this, I ended up eating it alone....

Now, I have a partner in crime... Yasmin. She loves this pudding as much as I do. Not Wardah & Balqis. They love only the caramel & expect us to eat up the left over pudding!!


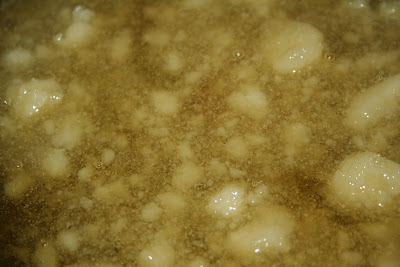
For this pudding first of all is to prepare the caramel. I don't use the instant caramel. Mine is homemade of course so I can control the level of sweetness. I prefer my caramel bitter sweet. I use 4 to 5 ladle of coarse sugar. Heat up the sugar alone in a pan. Let it melt on its own.


Once golden, pour in 2 to 3 cups of water. Make sure the sugar has properly melted. Careful because there will be a sizzling sound. Keep on stirring.


Now, the caramel is ready. Put aside to cool.


Next is the batter. Whisk 5 eggs using mixer. Crack each egg into a small bowl first before joining them all together in the mixing bowl. This is to make sure that no residue but only the yolk & the white egg is used. Hence, the texture of the pudding will be flawless.


After that, pour in a can of Ideal milk together with 3/4 can (the Ideal milk can) of water.


My little assistant pouring in the Ideal milk & the 3/4 can of water.


Don't forget a pinch of salt.


And of course a teaspoonful of vanilla essence.


Whisk everything for a couple of minutes.


Next, take a big container or 2 small containers & pour in the caramel prepared earlier.


Pour the batter onto the caramel.


My assistant joining the batter with the caramel.


Put the container in a steamer.


Steam for approximately an hour.


If you use a 2 tier steamer. Change the container after half an hour.


Let cool in the fridge.


My yummy cream caramel pudding.